Relationships In Salesforce & Lookup vs Master Detail Relationship in Salesforce
Relationship: It is a concept of linking/relate one object to another object. Relationship can be setup on both standard and custom objects. Relationship used to define how records in one object relate to another object records.
Example: Accounts can be having a one-to-many relationship with opportunities that means one Account may have one or more related opportunity records.
Lookup Relationship In Salesforce: Lookup relationship is simple relationship to link One Object to another Object. In this relationship Parent record is not mandatory while creating/updating record, that means we can create child record without entering parent record value.
Master Detail Relationship in Salesforce: Master Detail Relationship tightly coupled relationship between one object to another object. Why we called tightly coupled relationship, we can't create child record without entering parent value.
Difference Between Lookup and Master-Detail Relationship in Salesforce:
Look Up Relationship
|
Master-Detail
Relationship
|
We can create 25 lookup relationships for both
standard and custom objects
|
We can create only 2 master- detail relationships
for both standard and custom objects
|
Look Up
Relationship can create even if records already exists in child object
|
master- detail relationships cant be created if records already exists in child object.
|
If we
delete parent record, then child records will not be deleted/
|
If we delete parent record, then child
records will be deleted automatically.
|
It is a Optional field
|
It is a Mandatory field
|
The ownership and sharing of a child record
are not determined by the parent reord
|
The ownership and sharing of a child record
are determined by the master record
|
Lookup and Master Detail Relationship examples:
If we take College, we can have Student table, Teacher table, Branch table. First we need to create Student, Branch, Teacher Objects in salesforce.
Create Student Object with following fields:
1. Name (no need to create, by default it will come).
2. Fee (field type: Currency)
3. Year (field type: Picklist, picklist values: First Year, Second Year, Third Year).
Create Branch Object :
Create Teacher Object with following fields
1. Name (no need to create, by default it will come).
2. Experience in Number Of Years (field Type: Number).
Now we are done with creation of Student, Branch, Teacher objects creation. Now we are going to create following relationships between the objects.
1.Lookup relationship between Student and Teacher
2. Master Detail relationship between Student and Branch.
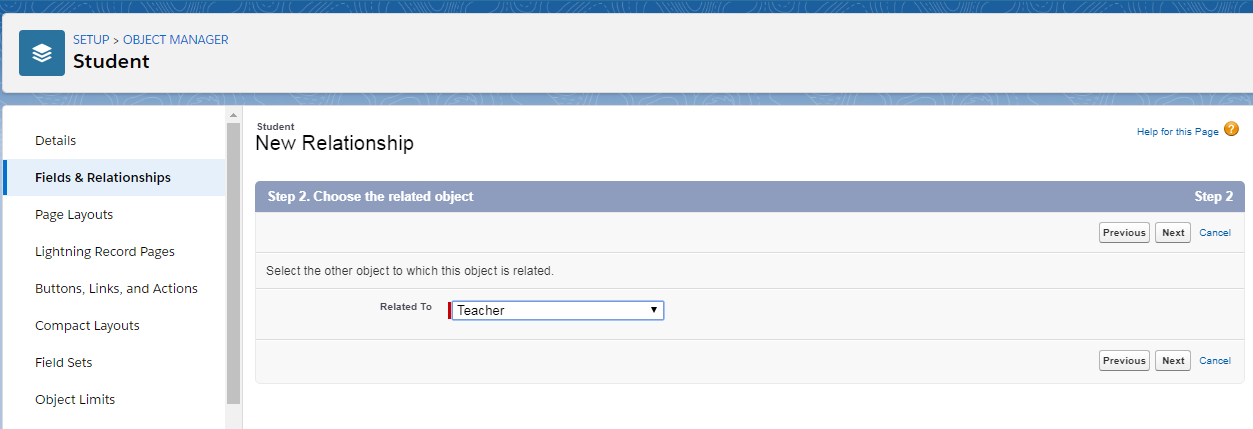
1.Lookup relationship between Student and Teacher
Setup--> Object Manager--> Student-->Fields & Relationships-->New
Step 1: Select Field type as Lookup Relationship
Step 2. Choose the related object Teacher
Step 3. Enter the label and name for the lookup field: Enter Class Teacher as a Label
Step 4. Establish field-level security for reference field : Give Visible access to "System Administrator" profile only.
Step 5. Add reference field to Page Layouts
Step 6. Add custom related lists.
and then click save. Now we are done with creation of lookup relationship between Student and Teacher object.
Try to create Student record, you can see Class Teacher field that is lookup to Teacher object. You can select Teacher record in that lookup.
Note: Try to save the record without entering Class Teacher field. Record will get saved even without entering Class Teacher lookup value. That means Parent is not mandatory in Lookup relationship.
Now try to create record Teacher record with Vamshi and create student with Name Venu and class Teacher value as Vamshi and save the record. After that delete the Vamshi record on Teacher object and check Venu record exist or not, it will be there. Because in lookup relationship if we delete parent record, child record wont be deleted.
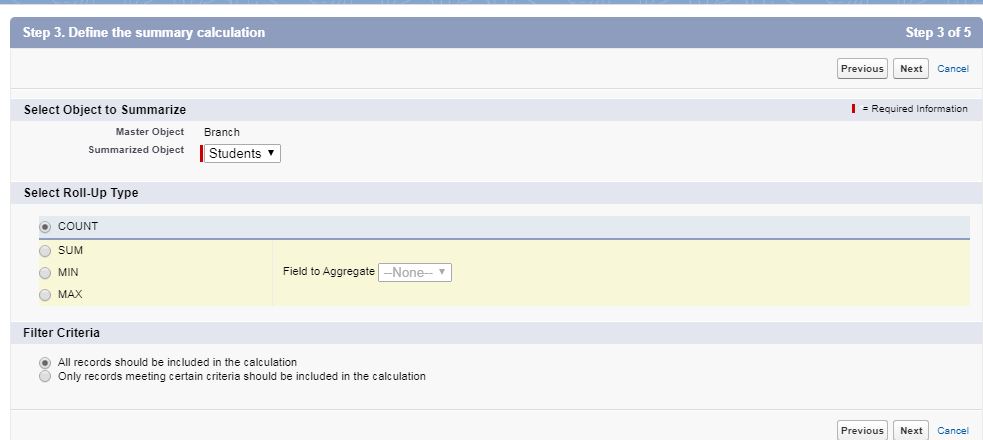
2. Master Detail relationship between Student and Branch.
Important Note: Make sure that no records should be created on Student object. Because If we have records on Child object we can't create Master Detail Relationship directly. Check below screen shot.
Setup--> Object Manager--> Student-->Fields & Relationships-->New
Step 1: Select Field type as Master-Detail Relationship
Step 2. Choose the related object : Branch
Step 3. Enter the label and name for the lookup field
Step 4. Establish field-level security for reference field : no need to do anything. click next.
Step 5. Add reference field to Page Layouts
Step 6. Add custom related lists
Click Save. Now we are done with creation of Master Detail relationship between Student and Branch object.
Try to create Student record without entering Branch field, record won't be saved until we enter the Branch value. Because in Master Detail Relationship, Parent is mandatory field.
Try to create Branch record With name CSE. Now try to create Student record with name Venu Gutta and select Branch Value as CSE and Save the record.
Now delete the CSE record on Branch object and check Venu Gutta record on Student object, record wont be available. In Master detail relationship if we delete parent record child record get deleted automatically.